Body Work Adventures – Part 3, Paint!

The Next episode from Julie and Tony….

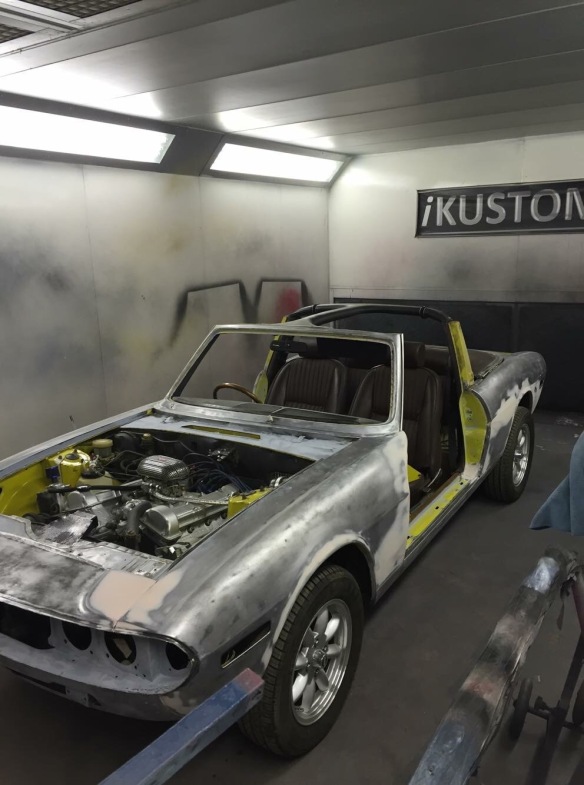
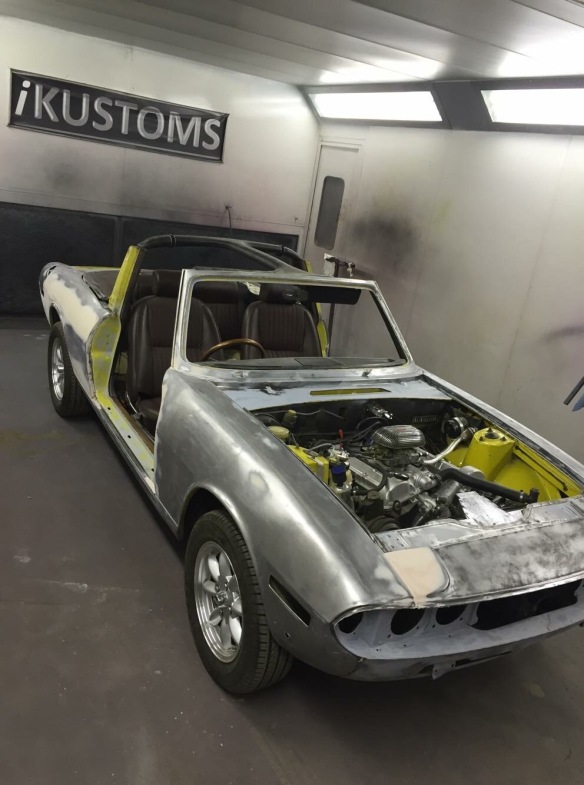
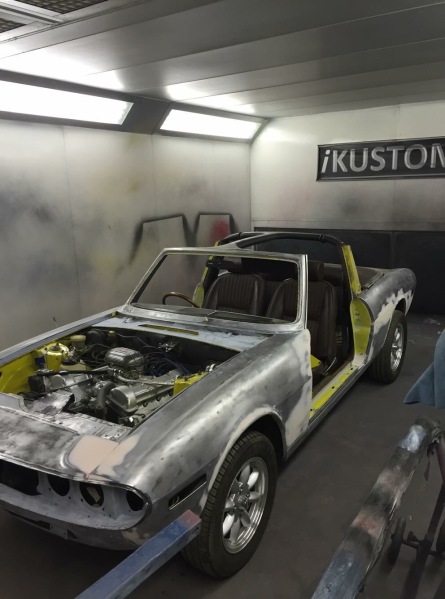
We left the Stag last time having made it to the spray booth, and just because it it now one of our favourite photo’s here it is again.

IMG_0147

Now we wait for the updates each day from Iain to show how the next stage is progressing.

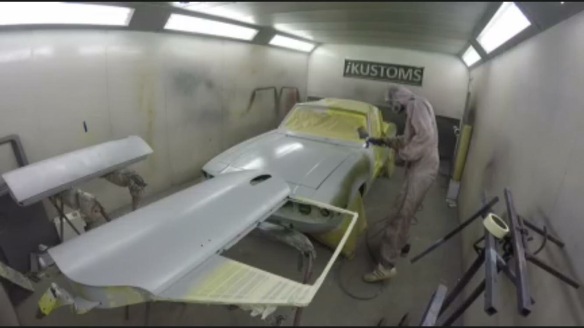
First we have the masking stage, keeping the paint to the places we want it and not where we don’t.

Next came the first spray action (nice suit!!!)

IMG_0155

Primer then flattened ready for colour

We had by this time arranged collection of the car, so we knew that paint was going on the next day. At the end of the day we checked to see if any new photos had come through from Iain. We were collecting the car the next day so we were not sure if there would be pictures…

There was a message – “How much do you want to see?”

Now Tony said to send pictures through so he could tease Julie, as I had been (Julie’s writing this 🙂 ) a little excited each day as the photos had arrived.

So our first glimpse

IMG_0156

And then…..

How beautiful!!!

The next day arrived and after the windscreen had been fitted – a wonderful and very satisfying job by all accounts – NOT we were to arrive to see the car and take her home.

Thanks to the windscreen fitter – Russell at Ultimate Windscreens, who did a fantastic job of refitting the glass and chrome trim.

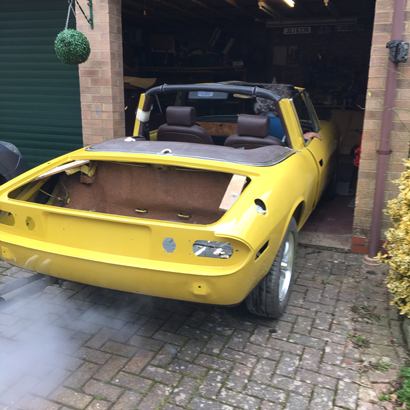
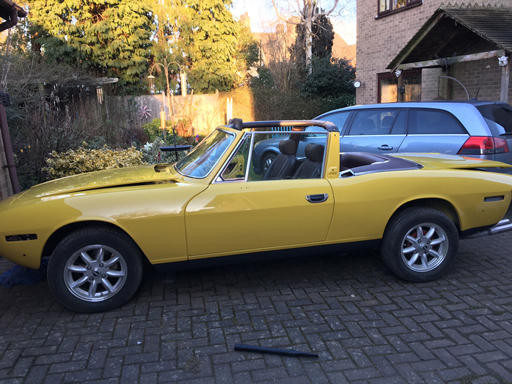
We arrived to find the car waiting for us outside the workshop.

The bonnet and boot were to follow on in a couple of days but it didn’t take away from just how stunning she looks!!

We chatted with Iain about the final look, and it is just as we wanted. The car retains its character, this is our car, it will take us to work, go shopping as well as days out and classic rallys.

Now transport arrives – Thanks Steve for both taking the car to the workshop and safely home (Steve is also taking the car to and from the NEC for the Restoration show too)

and safely home

IMG_0176

A few days later Iain arrived with the bonnet and boot, and very carefully – with only a few heart stopping moments they are fitted back to the car.

To get to this point the car we have spent around 150 hours stripping down, sanding and cleaning. There was then a further 90 hours with Iain at iKustoms

We still have to put the bumpers, lights, carpets, badges, grill etc back on the car – there is a nice long list.

IMG_0239

All ready for the NEC Restoration show. See you there March 5th and 6th – come and see the car on the Stag Owners Club stand Hall 6 Stand 340.
Body Work Adventure – Part 2, The Professionals

Tony and Julie’s story continues…

So the car was delivered to Iain and we also dropped of all the not so shiny bits to Northampton & Midland Plating for re-chroming.

Thanks now go to Iain at iKustoms for taking pictures as he was working so we could see how the car was coming along.

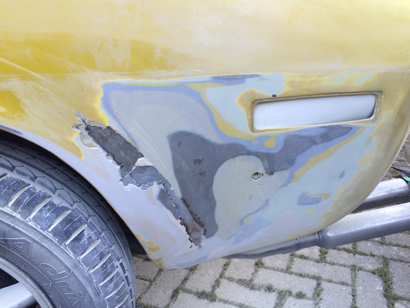
The horrible previous repair that had been done to the rear nearside wing just wasn’t recoverable so Iain sourced a new panel to repair the worst of the rear wing.

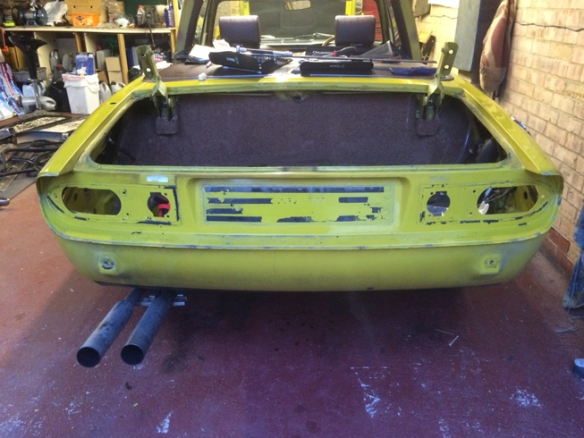
From Frankenstein to a very lovely curvy rear end!

One of the holes in the nearside front wing was also give the new panel treatment

She also had a new panel on the front above the lights, work on the nearside door opening, lots of dents dealt with and all in all a dam good going over.

We were so pleased with the work that Iain did and all along we had photo updates – even when we were living it up on the beautiful French alps (our annual snowboarding pilgrimage).

The one evening the photos came through that showed she had made it to the spray booth, these are fantastic shots showing just how little filler was needed once all the repairs had been done – and right this time!

IMG_0147

IMG_0146 (1)

Its now getting very exciting!!!

Meanwhile in a quite street in Northampton the not so shiny bits have been stripped, re-chromed and polished to perfection.

Credit here to the guys at Northampton & Midland plating for the shots they took too.

Well almost perfection, we didn’t want to make our car perfect, so a small hole in the front bumper was left un-repaired (its underneath so you never see it!!) and the small crease in the rear bumper where one of the couple (to remain nameless!!) reversed very gently into a street light remains also – well it keeps it “our car”!!

Its like Christmas Day when you get all your chrome home and you unwrap it from its protection to see your face in every last bit!!!

Next time…. Paint……

IMG_0153


Body Work Adventure – Part 1, The Great Strip

Tony and Julie tell there story of their Stag strip down and re-paint….

We have owned our Stag for 5 years, it was bought as a car to be used and improved as we went along. With loads of help and support from Stag Owners Club members we have replaced the suspension all round, replaced the diff nose and refurbished the cylinder heads. With the knowledge from working with club members we have tackled on our own replacing the exhaust, changing the carburetors, rear brakes, water pump, replaced the front lights and re-veneered the dashboard. This winter we decided that we needed to find out just how good or bad the bodywork is as we had some cracking on the rear wing and rust coming through on the boot.

We found a recommended body shop just 5 mins from where we live, so towards the end of the summer we paid Iain at iKustoms a visit to look over the car and discuss the work. We wanted to play an active part in the restoration so as we have no welding, or any other bodywork skills we did the best job……. stripping off all the paint, and yes we were to go all the way to base metal!!

We started in October, I am not sure we knew just what it was we were taking on. It was a mammoth job, and quite scary as you really have no idea just what you are going to find when the paint and filler is eventually removed.

IMG_3225

We started outside on the nearside back wing where there was a crack in the paintwork around 5″ in diameter, apart from the rust showing through on the boot lid that was the place we thought was going to be the worst.

IMG_1107Once we got through the top coat of paint you could see a large amount of filler, at first we carried on with the sanding, but when the filler started to “move” we changed tactics to a screwdriver and hammer to gently chisel the filler off.

A rather bad repair job was revealed under in some places 5mm of filler!!

From then on it was hard labour with many many sanding sheets and hours. As we started in November and chances are we were not going to get many dry weekends we decided to partition the garage with floor to ceiling plastic sheets – only took 2 of them and it would help keep the dust out of the other half of the garage (not all the dust but it would help!!)

We knew that our car had perhaps not been looked after that well previous to us buying it and so we were very surprised at how few holes we actually found. The nearside turned out to be the worst with a few bad repairs to the rear wing and 3 fairly small holes along the bottom edge where the panels meet the sills.

Under Iain’s instructions we etch primed each panel as it was rubbed down (after any rust treatment had been applied) to keep rust bug at bay until he took over.

We had put the hard top on the car while we were sanding to try and keep some of the dust out of the car. This did help, the hardtop was not being sprayed as it has sat in our garage for 3 years and not been used so this was its last task and would be sold on once the car goes to iKustoms for the work to begin.

Our bonnet and boot were not the best, the bonnet was quite easy to source as there are plenty out there. The boot however is another matter, we were very lucky to hear about a very good and solid boot lid that was for sale and so snapped that up. Once we finished sanding the main car and on a dry day just before Christmas we pushed her out of the garage so we could try on the new boot and bonnet but also start the other mammoth job of removing the dust from the garage!!

Oh yeah the hard top did a good job of keeping some of the dust out of the car but not all!!!

IMG_1180

On 20th January the car was transported up to Iain’s workshop for the transformation to begin.

Now we wait for Iain to work his magic on the bodywork and the sad looking grey car that left will come back in all her glory ready for her debut at the NEC Restoration Show in March.

Next time – what happened at the body shop and chromers…….


Fastback Stag Restoration

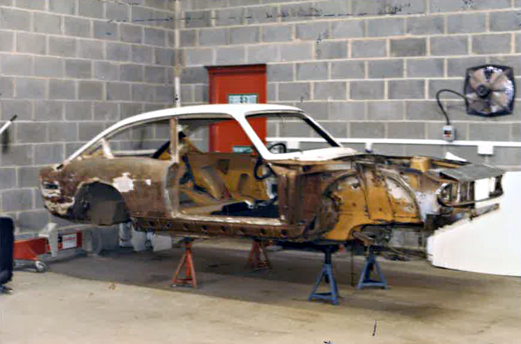
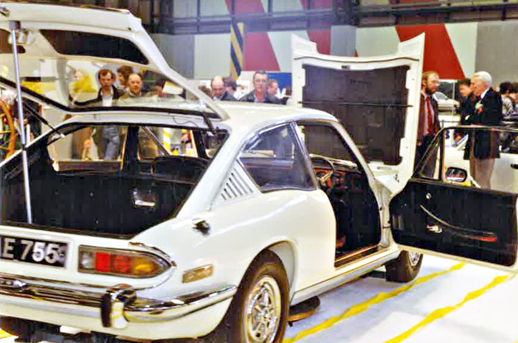
Hi, Firstly may I introduce myself. My name is Alan Wickes and back in the very early 1980s I ran a small body repair shop, accident repairs, resprays etc, and through one of my customers I was introduced to Alan Hart. His real enthusiasm at that time was for Triumph motor cars but had just purchased a Porsche 911rs lightweight which I went on to restore for him and our friendship grew from that.

Probably around twelve months later he told me of an opportunity he had of purchasing a Stag fastback that may require a little work! Well he couldn’t resist and duly brought it round for me to assess. Alan was such a nice guy I did not want to let him down. I worked as a one man band and had other work on the go so we agreed it would be on an ‘as and when’ basis. I explained to Alan that to make a proper assessment the paint must be removed to expose what was lurking beneath. He agreed and the paint was removed…… and what a can of worms!…..was I out of my depth here.?…poor me …what had I let myself in for. Little did I know that three years of anguish lay ahead. From then on piece by piece, panel by panel was cut away until a stripped out shell sat forlornly on axle stands in the corner of my workshop. I have to admit that without Alan’s undying enthusiasm and support I do not think I could have seen it through to the end.

Restoration-1

Accident repair work was my passion at that time, I always gained great satisfaction from looking at the end result knowing that you could not tell if it had ever been damaged, and all in a relatively short time. Now I was out of my comfort zone. Cutting away rust to find more rust just did not do it for me. I had made a deal with Alan and was determined to stick with it. Progress was painfully slow and I still had other obligations. Back on the Stag again and time to start on the doors. Having previously stripped all the paint off it was plain to see that both door lower corners had rotted clean through. Normal circumstances would dictate new door skins, but here again we wanted to keep to the original as much as possible. I cut triangular sections from both corners, fabricated matching pieces and with the help of my newly acquired state of the art flange tool  welded them in. Success, I was gaining in confidence by this time.

Unfortunately, just as I was getting back into it again other work called me away and it would be several weeks before I would be back on it again. Anyone who has ever been involved in body and paint will know how labour intensive it all can be. I wanted to be sure that any patches I welded in would last a good few years so lead loading would be called for. Fortunately I had done a little before!

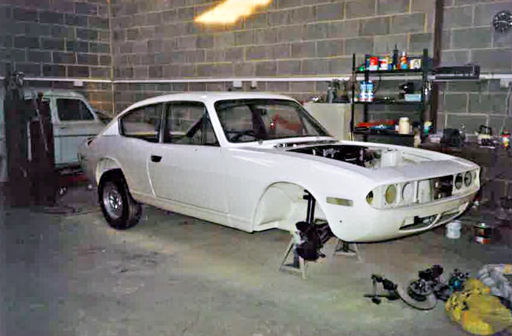
I was taught how to lead load from a skilled hand who worked at Jaguar cars lead loading E types all day! I never got to match his skill level but what I learned got me by. Putting it on was OK but filing it down and sanding to a reasonable finish seemed to take forever. In the meantime Alan was busy behind the scenes sourcing various parts. A major problem was that the windscreen had a large crack in it and that none of the large glass manufacturers had any drawings or records of it ever being made. Never one to shy away from a problem he managed to persuade one of them to haul it through their stock to see if they could find one that matched the profile of the fastback screen, Well they did! A VW Variant 412 if my memory serves me well. All that was needed was a bit of trimming from the corners and it was perfect. After another few weeks away I was back on and determined to get the bodyshell ready for paint but I decided for some reason to deviate from that and started chiseling away at the old paint under the front footwells…….disaster, parts of the footwell on both sides just crumbled away. Another week fashioning and welding in repair panels. Now it was ready for its first coat of paint. One coat of etch primer followed by four coats of high build primer and finishing with a guide coat. Boy did it look good after so long.! I treated myself to a cup of tea and something stronger later……..a milestone had been reached. This was a time before low bake ovens, two pack enamels and lacquer, so at least a few days were needed for it to settle and harden before any wet-flatting could be done. It took a whole day to wet-flat the body and apply two coats of light primer surfacer. I left it to stand for another day before a final nib and spirit wipe. Now after all this time it was ready for its final colour coats.

Restoration-2

The paint I used back then was cellulose, ICI no less, the paint of the day. It took most of the day to apply three coats plus one final heavy coat giving a fairly nice gloss finish, nowhere near the finish you can get with basecoat and lacquers of today. You needed time between coats making it a lengthy process. All the mechanical parts Alan took away to be refurbished were, as if by magic, reappearing. Now was the time to get it back on its wheels. Everything was ready. All the parts had been shot blasted reconditioned and painted, it all looked new. The brand new stainless exhaust system looked stunning. After a few days it was  assembled and back standing on its wheels for the first time for over two years. A week or so later the engine that had been rebuilt by Geoff Poyner from Cheltenham was back and refitted over one weekend. I came back in on a Monday morning to find a note with some instructions asking me to finish off a few items and then fire it up!! Well with great trepidation I did. It sprang into life first time, it sounded wonderful. After it had warmed up there was just a small leak from a hose,this I duly tightened and that was it.  Alan was round in a flash and I am sure I saw a tear in his eye. Who could blame him!

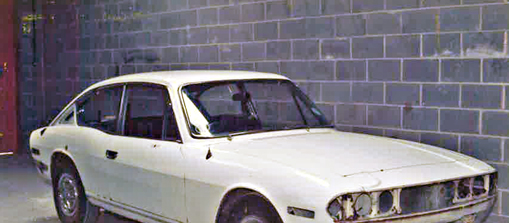
Now I could see light at the end of the tunnel. Alan was now bringing parts back that I had not seen for over 18 months. He must have been storing them up and holding them back so as not to appear pushy. I am sure he sensed I had become a little stressed with it all. I remember the front and rear bumpers were in a sorry state, rusted through in places. He found someone to weld in plates and re-chrome them, they were just like new. Before I could rebuild with all the new and refurbished parts I had to de-nib the paint and polish using cutting paste and electric polisher with lambswool mop head. Cellulose paint requires a lot of work to attain a good gloss finish. A final wipe over with a damp cloth then a buff with a new lambswool mop to remove any swirl marks. This process took a whole day! One last determined effort was needed now to finish the job. No more interruptions, just press on. Fortunately during this period a lot of my other work dried up somewhat and so little by little it all started coming together. That windscreen by the way, fitted perfectly. I thought to myself, do not crack this one putting it in, but what a relief!

Restoration-3

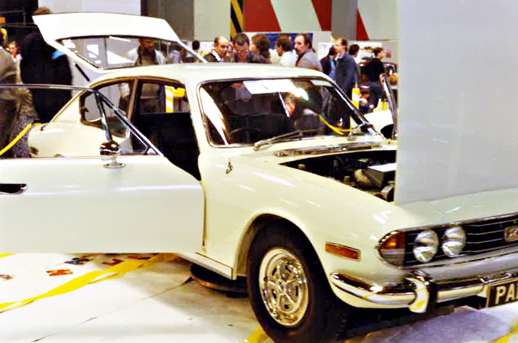
The following four weeks were devoted entirely to  reassembly. Waxoil was sprayed in all the cavities before all the interior trims were fitted back. One more day of cleaning and a wax polish and for me it was over. I think we were both a little emotional the day he came to collect it . A friend of Alan came with him to take some pictures of the handover and I was presented with a bottle of bubbly. That was it, three years on and off to completion. The Stag Fastback was displayed at a classic car show at the N.E.C. and that was the last time I saw it in the flesh.

NEC-1

NEC-2

It must be thirty years now. Alan came to me from time to time with various much smaller projects but not long after I ceased trading and took up employment with Aston Martin. I am now retired and reflect more on my past work I never grasped the significance of what I had done with the Stag at the time ,but having related my story to a friend, he persuaded me to come out of the shadows and relate it to you. So I actually feel quite proud to have played a part in saving a British icon,

I take my hat off to all you Stag owners out there doing the same, I sort of know what you are going through! Well I hope my story will be of some interest to you. This is the first time I have ever done anything like this so you will have to let me know what you think.

If you have anything you wish to ask about any other aspect of the restoration please do not hesitate to ask – just post a question on this blog.

Thanks, Alan Wickes

Stag Engines Reunited

I used to own a 1965 signal red TR4a. it was very pretty and very reliable but with the onset of children, not very practical without any rear seats!

My friend James, already a Stag owner, used to let me keep it in his farm workshop over the winter months and regularly told me that I really needed to buy a Stag.

My one disappointment with the TR4a had always been its lack of a throaty roar, so a couple of years ago, I bit the bullet and started searching.

I knew what I wanted so I only looked at a couple of cars before seeing an advert for one in the west of Scotland. I managed to tie a visit in with a business trip, and armed with cash from the sale of the TR, did a deal. The next challenge was to get my new Stag home to Kent which was solved when another friend recommended a local transportation company….money well spent!

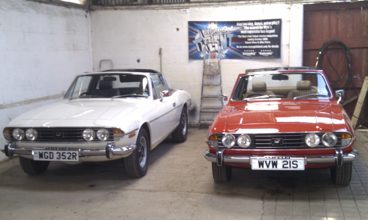
So James and I lined up our Stags in his workshop and tinkered and fettled….as you do, until I looked at his commission plate. Despite his being purchased in Kent, and mine in the West of Scotland, they are only 9 cars apart. With a bit of research, I have discovered that they initially both headed to the West Country as the registration, WG is for Exeter and WV is for Bristol. Not so remarkable you might say until a couple of weeks ago when I was in the process of upgrading my ignition and coil.

With the coil out, I was able to read the engine number stamp and made a note of it – LE44741HE. Wondering what James’s engine number was, bearing in mind their close commission numbers, I peered into his engine bay with a torch. I couldn’t believe what I scribbled down – LE44742HE. Two cars sitting next to each other after 38 years with consecutive engine numbers. Why doesn’t that happen in the lottery?

Stag reunited1

So how were these cars built on the production line? Presumably, bodies on one and engines on the other. Were our engines built by the same person? If they were, he did a good job because they’ve both survived this far and have just returned from a 500 mile round trip thrashing down the French autoroutes to Laon.

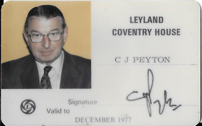
Coincidentally my grandfather , CJ Peyton, was financial director at British Leyland having come across from Rover in the amalgamation. My mum remembers Spen King and Harry Webster who used to come to the house.

Stags Reunited2

I remember as a small boy travelling in various “test” models when we visited at weekends including the prototype Range Rover which we took to Holland. My dad discovered a fault on a pre production Dolomite Sprint when he couldn’t release the handbrake after we parked up for lunch and I have a vivid memory of a white Triumph 2.5 PI estate that even then seemed incredibly fast!

I was fascinated by the overdrive on top of the gear stick and think of him every time I get my foot down in the Stag and flick the switch!

Our thanks to Simon Lord for his article

Aberdeen Stag Rebuild

With thanks to Anthony Davies for his story about his Stag……

I bought my second Triumph Stag in 1981 to use as my everyday vehicle and drove it daily for most of the next 8 years. Coming from an Engineering background, I tackled nearly all of the maintenance myself and got to know the car inside out. However, from the late 80’s to the mid-00’s, my occupation demanded that I worked away from home quite a lot – sometimes for very lengthy periods – before finally ‘coming home’ in 2005.

During this time the car was kept in reasonable order, living in a garage with essential maintenance performed, fluids topped up, oil and filters changed and so on but it had been gradually getting used less and less to the point of maybe a half dozen times a year, when I would take it out for a good run, get it up to temperature then return to storage for another few months. The thing is, older cars don’t really like this too much and in January 2006, on a sunny Sunday afternoon when out for one such run the inevitable happened and one of the Head gaskets blew.

The aluminium heads were removed but as I hadn’t really being considering the coolant composition too much over the years, the strength of the mixture had been getting weaker and weaker, resulting in severe corrosion which had reduced the internal waterways of the heads to a point where at best, they were well over 50% and at worst, totally blocked, rendering them utterly useless. And so the journey began…..

A reconditioned pair of heads was purchased, however another problem soon surfaced – the cylinder bores were fairly well worn and piston movement was also evident.

This was to become a turning point. Having owned the car for so long and knowing all of its history did I really want to start a full dismantling and refurbishing exercise on the original engine or would I be better to go along the exchange unit route? Electing the latter, I ordered up an exchange engine power unit and then very shortly after, a gearbox, overdrive unit, clutch assembly, diff and all the bits and pieces that go along with these.

OLYMPUS DIGITAL CAMERA

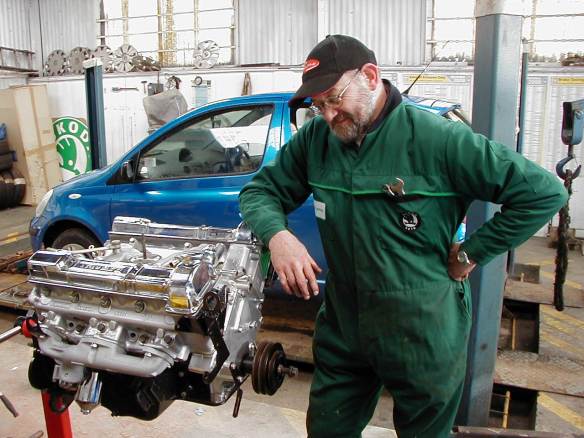
Danny with refurbished engine

It was by this time over a year since the car had been laid up and only really starting to move. This is where the local Triumph network kicked in, as one of the members kindly asked around for a mechanic who specialized in Stags and I was given the name of Danny Taylor at Victoria Garage, Maud. In October 2007 Danny had a look at the car and said ‘It needs a fair bit of work done but yes, I can do it!’ And off it went….

Of course, now I had access to a specialist to tackle the mechanics I could think about going the whole hog – did I really want to do that? – well, I’d gone so far now that there really was no going back.

So, the whole car was dismantled and everything was now up for renewal – suspension, chassis legs, brakes, steering rack, bushes, body panels, wings, doors, chrome, electrics etcetera etcetera – it was now into the full resto. Not a job for the faint-hearted..

As I said earlier, I thought that I had kept the car in reasonable condition throughout its life but was horrified at what was found during the restoration. These problems were not always evident – I remember that there were some small bits of corrosion on the bottom of the A-posts each side, which had been there for hmm..a while at least and were always meant to get sorted, the next time the car went in for some bodywork. These and other ‘small bits of corrosion’ were actually rotten all the way through! Holes and weak points in the chassis only surfaced with a good dig into the underseal. All of these nasty bits were inspected, assessed and corrected accordingly either with completely new or repair sections.

I could go on and on about what else was done, what was replaced and so on but won’t; the list is substantial to say the least. All that I will say is that, after 3 and a half years, having had a full refurbishment inside and out, I now have a stunning example of what a Stag should be like, thanks in the main to Danny for his relentless dedication and enthusiasm, Victoria Garage at Maud, the Stag Owners’ Club, various specialist providers of Stag bits, e-Bay for those ‘special items’ including a perfectly matching oil pressure gauge which are like hen’s teeth and re-chroming of all the shiny bits.

Finally, just as the rebuild was nearing completion, I saw a number plate for sale and thought to myself ‘well, you only live once and it would finish it off nicely’…….it does look good…!


It’s just an Exhaust……..

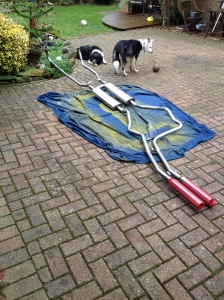
One weekend we decided to take the plunge and begin the process of replacing the exhaust from end to end. We had purchased the exhaust a while earlier and now it was time to take the hole ridden rot box off the stag and put the shiny new exhaust on.

The New Shiny Exhaust

The New Shiny Exhaust

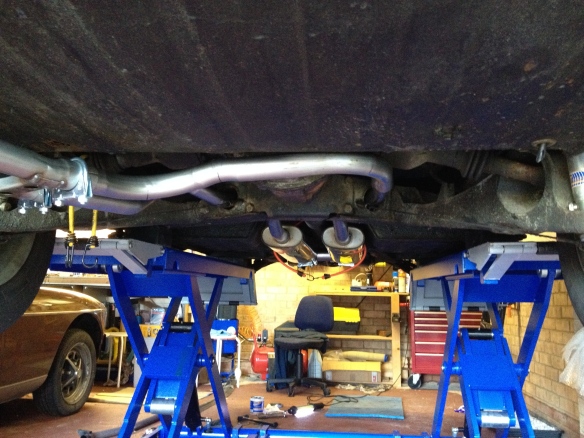
With the exhausts approved by the dogs we loaded the stag on to the car lift and began what would turn out to be a long a drawn out process.

Once the stag was on the lift we could get a full look at the state of the exhaust and it was not pretty, between holes, rust and brackets falling off it made it an interesting adventure.

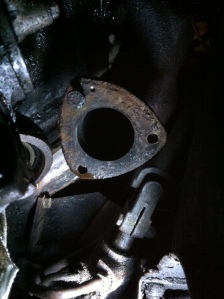
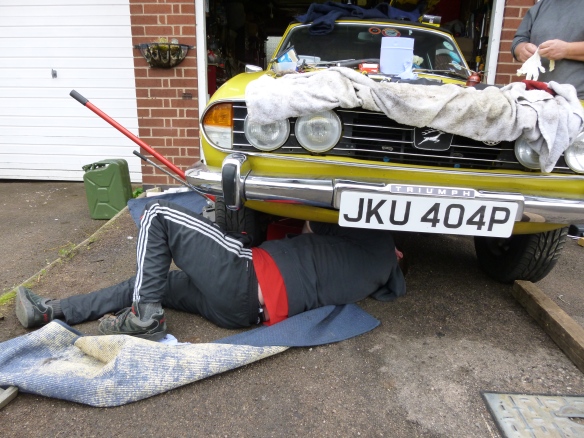
Have now seen the state of our exhaust we started by getting the nuts off the manifold end of the exhaust, well, we tried, 5 out of 6 nuts said yes but there is always the one that says no, and boy did it say No with a capital N.

A Stuck Bolt

A stuck bolt

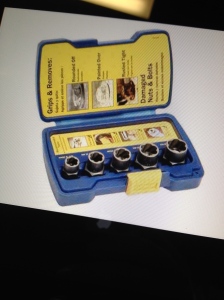
These will get it out

These will get it out

When i said it said no, i mean it would not budge when we asked it nicely, hit it, used a socket set, bought and used nut extractors and finally swore at it – this thing was not for moving. We spent several hours using a junior hacksaw cutting round the bolt in the exhaust to see if we could get more purchase one the delightful little treasure.  After many hours of trying to get the bolt out we put in a call to friend with a welder who reckoned that we could possibly weld a nut on to the bolt and this would allow us to get some more purchase on the nut.

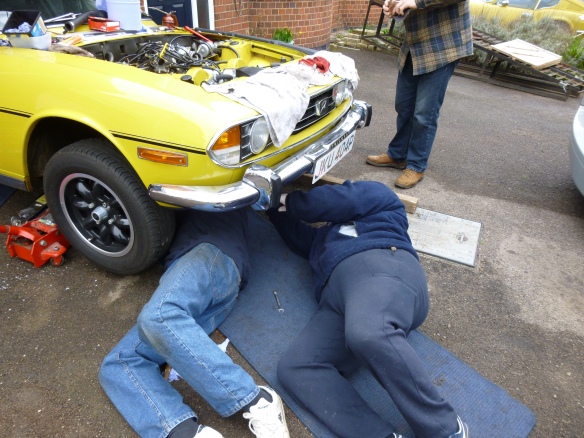
So, one cold january saturday morning our friend appears with his welder in the boot and Jules was wandering around like a kid in the sweetie shop wanting to have a go with the welder. So up went the stag yet again, welder was plugged in and 2 little goblins were sat under the car full of intent and optimism. At this point the the welding started and slowly over the coming hour the the colour of the air began to turn blue as the nut would weld to the bolt, but the bolt was not for budging.

After a couple of hours of trying to weld something, anything to the bolt to get it out we had to admit defeat and discuss the options, of which there were only 2, our friend goes home and gets their plasma cutter and we cut it out or we drill it out – out came the drill!

After a spot of lunch the rest of the afternoon are dedicated to drilling out the infernal bolt, and when i say the rest of the afternoon, it was light when we started and dark when we and finally drilled the little treasure out – now we can begin the the process of putting the new exhaust in place, well we can on sunday.

Up bright and early on the sunday morning to begin by removing the remaining parts of the exhaust left on the car from saturday and started the process of putting the new exhaust on to the stag, but first we had to find a bolt that would work with the new hole drilled out on saturday, and with this new bolt in place we begin the tricky job of getting all the parts lined up.

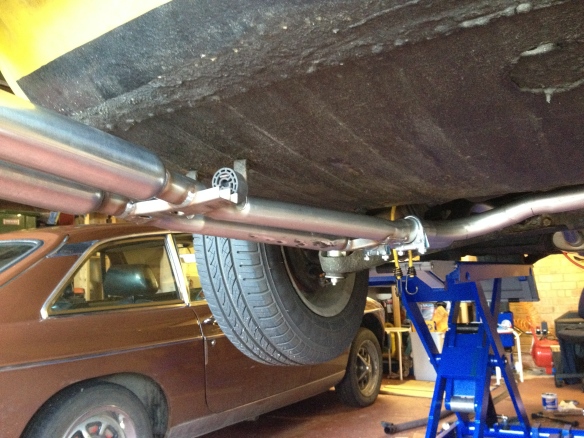
First to go on are the brackets to support the exhaust just before they go thru the cross member, and then the great threading began starting at the manifold end and then gently bolting up the each part loosely to allow us flexibility to nudge the exhaust in to place.

It took a couple of hours to get in to place where we could start to tightening everything and look to put the new oil filter back. All in all it took about 4 hours to remove the remaining parts of the old exhaust and put the new exhaust in place before fitting the new oil filter.

and with the shiny new tail pipes looking and sounding great our work here was done part from filling her back up with oil and running her in.

Lovely

A lot easier with a lift

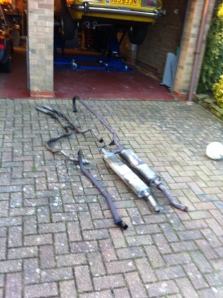
I am pleased to report that despite a small mishap with the oil filter the car is running well and sounds great and with everything copper eased should we need to do this again everything should come apart easier, all i have to do is a small trip to the tip to find the old exhaust a new home.

The old one out on the drive

The old one out on the drive


PLEASE NOTE – these are NOT instructions on how to undertake this job just some pics and words of our experiences, always consult professionals when undertaking any repairs or restorations. (please refer to the disclaimer on our about page)

On Your Marks, Get Set, Will She Go??!!

Round Six – Final Assembly and Start-up.

After our ‘open day’ where the bulk of the work was done, we needed a couple more hours of final fettling to get the old girl running.  Sunday morning at a sensible hour (11am) saw Roger and Bill spending yet another day with me sorting out my car. What a couple of stars they are! This is what the Stag Owners Club is all about!

My flexible tool Sam getting to grips with the exhaust downpipe connection. Some quite colourful language was heard as it was proving a little troublesome.

Final Assembly 001

The second shift at the exhaust was taken by Dad. Not sure what Roger was up to but the body warmth was welcome…..(he was actually fitting the fan cowling).

Final Assembly 002

Bill, with a newly painted expansion bottle clamp.

Final Assembly 003

Here’s Sam still battling with the troublesome exhaust. We eventually had to undo the first joint clamps and support bracket by the gearbox to get enough room to mate downpipe to manifold and we needed to take off the oil filter so we could get the nut onto the stud.    What a pain!

Final Assembly 004

Bill and Roger spent some time sorting out the throttle and choke cables as they were frayed and the retaining screw had been modified (cobbled) so they had to sleeve the cable in the end so we could get it to bite and hold.

Final Assembly 007

Almost ready for the fire up. Fingers crossed.

Final Assembly 008

Running!      Phew!

Final Assembly 009

All done! Doesn’t she look nice. More to the point, doesn’t she go well! A massive vote of thanks to Bill and Roger for all of their expertise and help in getting this job done.

Final Assembly 011


PLEASE NOTE – these are NOT instructions on how to undertake this job just some pics and words of our experiences, always consult professionals when undertaking any repairs or restorations. (please refer to the disclaimer on our about page)

Stag Party (or bring a spanner day)

Round Five – Final Assembly Day 1 (main day).

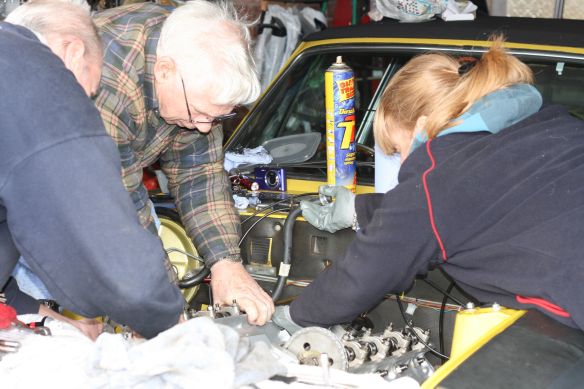
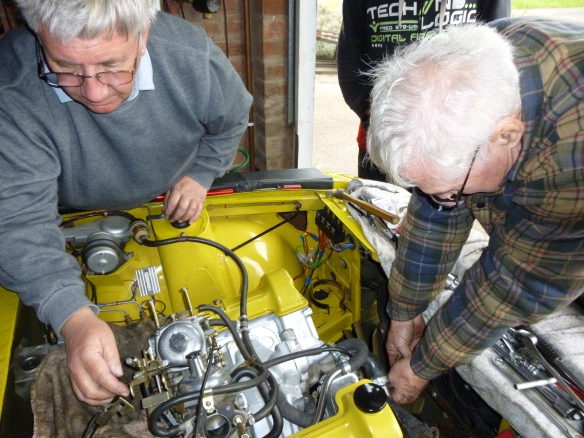
We had a bright idea to have a Stag Party at my place for the re-build. Tall order to get the whole engine back together and running in a day, but we thought we’d give it a go. A few of our local Stag Owners Club members arrived at 9:30 for the start of proceedings. For people who had never seen an engine this far stripped they all seemed to enjoy themselves asking loads of questions and picking up a good few tips as we went through the re-build.

We started in my shed just fettling the last few bits.

Chains ready for the head fitting and final adjustments.

IMG_3983

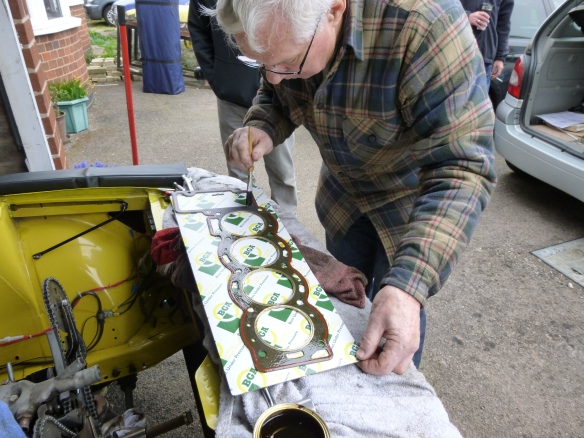
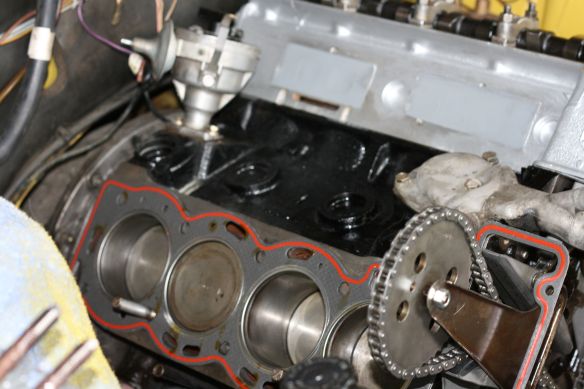
Bill applies the Wellseal sealant to the gasket before assembly. Some people put gaskets on dry, others use sealant. I chose to use Wellseal.

Rebuild day 1 003

Left hand head in position ready for new studs etc.

IMG_4007Right hand head gasket in place ready for the head. Note you can see one of the two short studs used to take the weight of head as you position it ready for the studs to be inserted. Without these locator studs you would really struggle to hold the heads and locate the studs. Once you’ve put the head studs in place you simply remove the short ones and put in the bolts. P.S. these locator studs are old ones cut down with a slot cut into the end for removal with a screwdriver.

IMG_4042

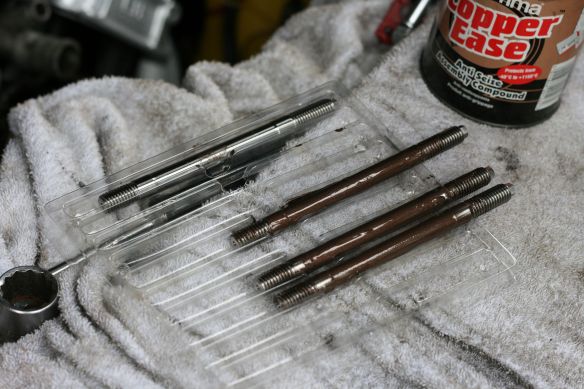
Here’s the new stainless steel studs being copper greased prior to assembly into the head. Expensive studs but should be good for life! Being stainless there should be no chance of the heads ‘welding’ themselves to the stud in use.

IMG_4044

Head being lowered into position. In this case many hands make light work.

IMG_4058

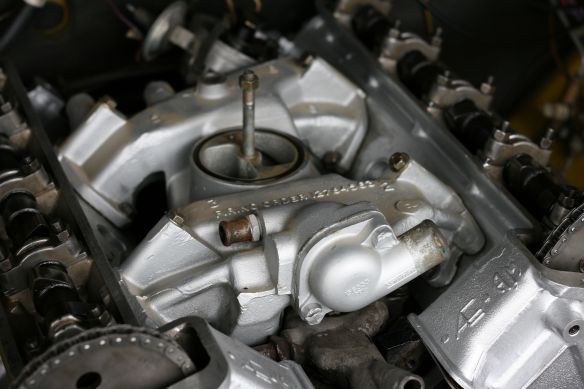
Inlet manifold in place. A bit of a fiddle with the gaskets, but once you start one bolt it’s fairly simple to line up the remainder. We used the Wellseal on the inlet gaskets too.

IMG_4086

Torqueing up the head. We did ours to 60 lb/ft.

IMG_4087

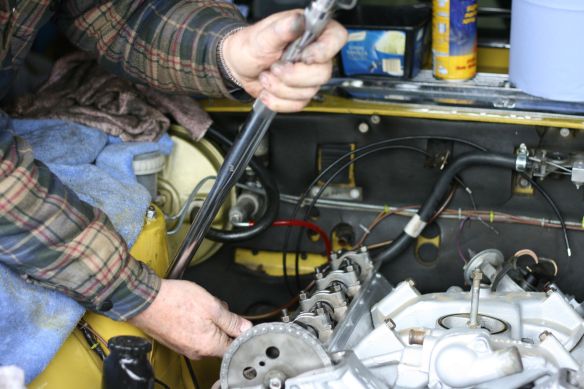
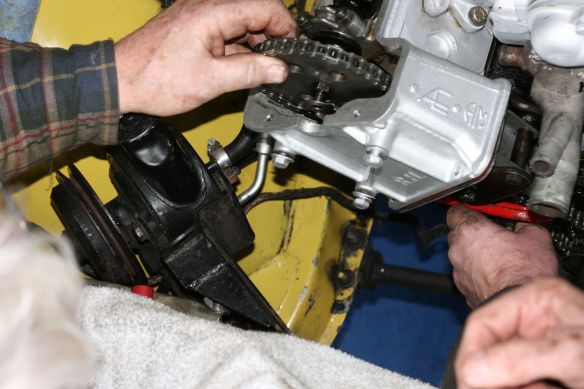
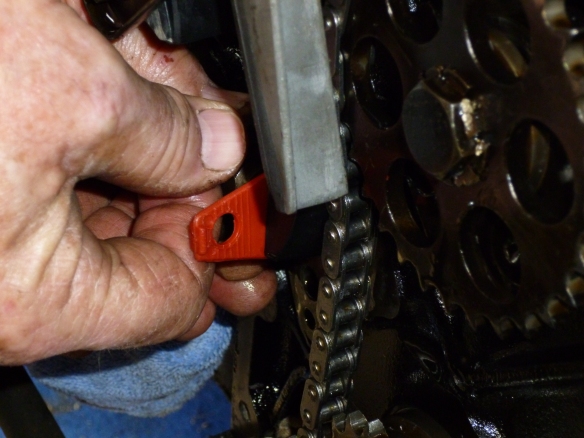
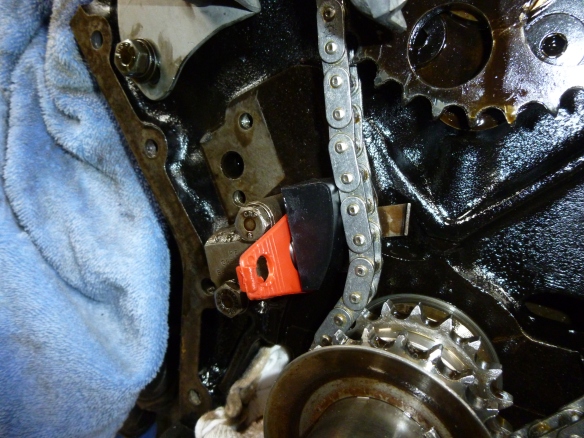
Making sure we had the sprockets in the correct alignment with the slack on the correct side of the chain and the timing marks all lined up. Then we could release the tensioners, by removing the red plastic packing pieces.

IMG_4102

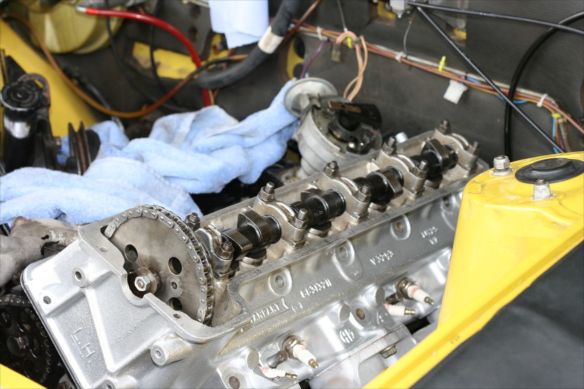
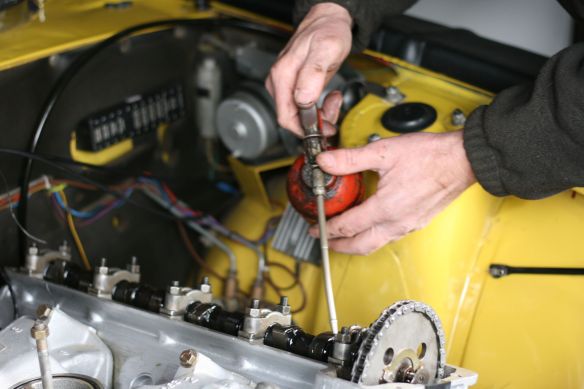
Applying a bit of oil before we put the cam covers in place. Don’t forget, it will take a little while for the oil to get up to the heads once we start the old bird, so a generous soaking of oil over the followers beforehand is useful.

IMG_4140

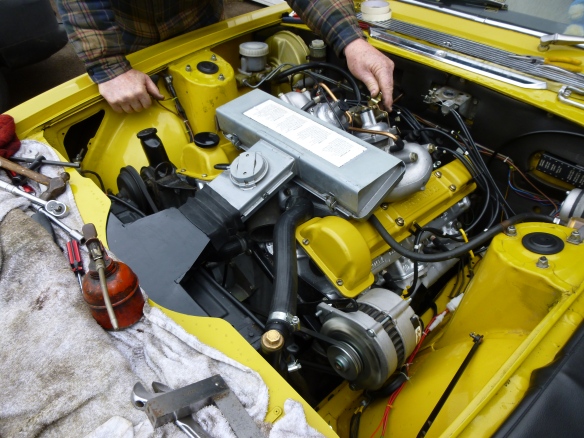
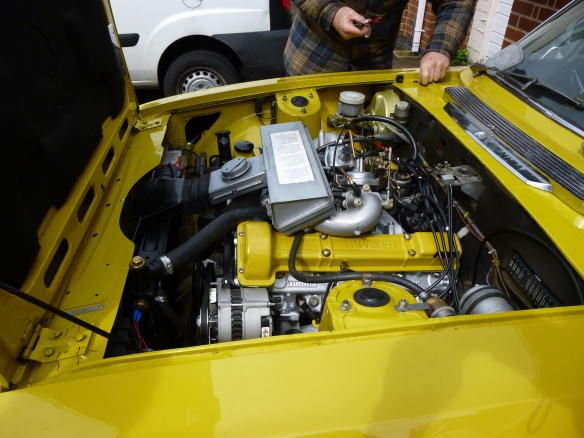
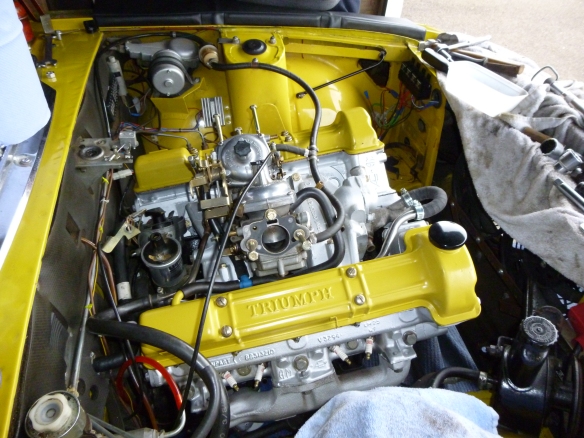
Carbs are on.

Rebuild day 1 005

Cables and pipe connection.

Rebuild day 1 006

It was always an ambitious task to get everything back in one day, especially when the better half keeps laying on copious quantities of tea, coffee, cake, biscuits and lunch……munching and slurping our way through that lot took half the day! We finished off the final bits the following day.

See the last instalment to see if we succeeded in getting the old bird going.


PLEASE NOTE – these are NOT instructions on how to undertake this job just some pics and words of our experiences, always consult professionals when undertaking any repairs or restorations. (please refer to the disclaimer on our about page)

Its All in the Timing

Round Four – Final Prep and Timing Gear Partial Refit.

This part of the proceedings is a few hours of finishing off dismantling of timing chains and the re-mating of heads and manifolds etc.

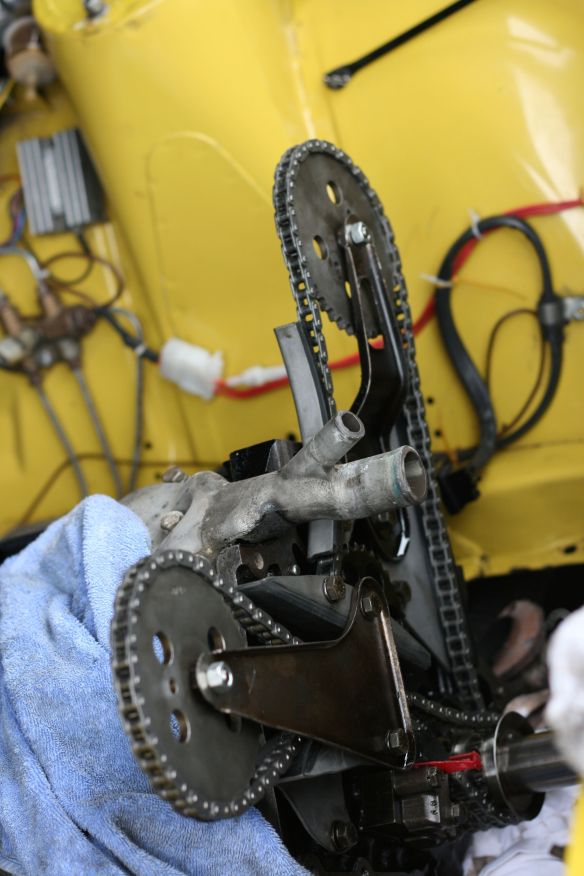
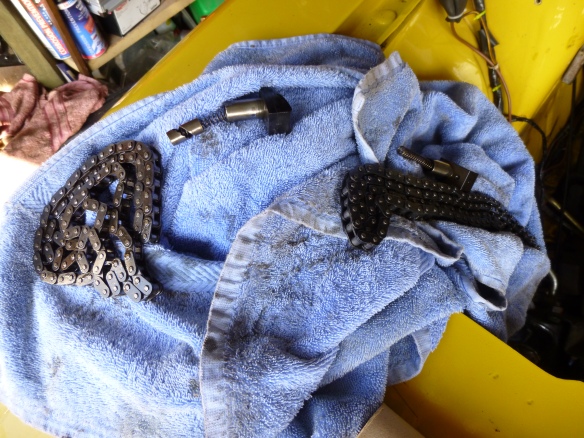
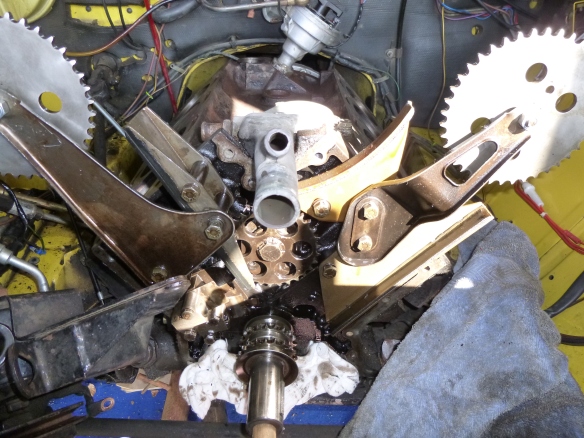
Here are the chains removed with the internal parts of the tensioners also removed.

Final Prep - Chain Removal 001

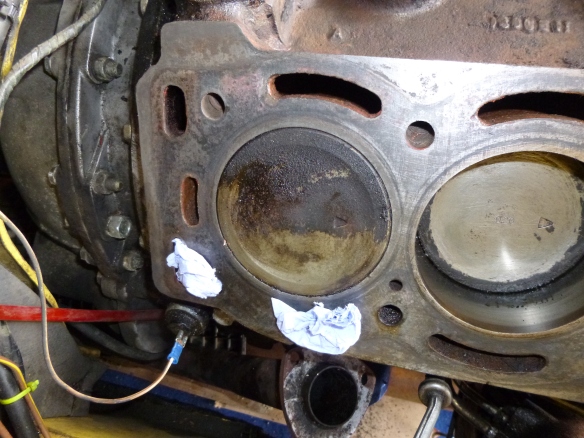
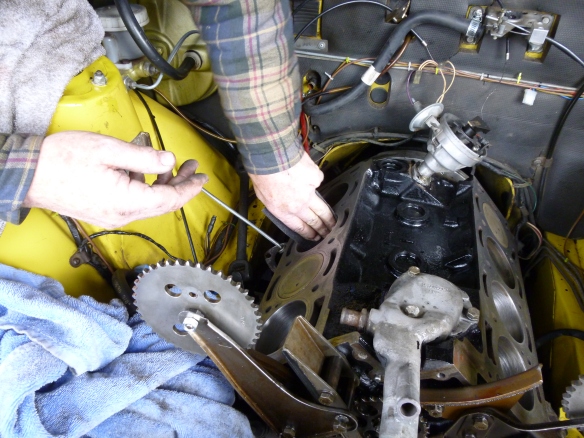
As if we needed any more proof that the gaskets were blown here is the number 7 piston crown showing clearly a very clean part, which has been steam cleaned by the leaking water into the bore.

Final Prep - Chain Removal 002

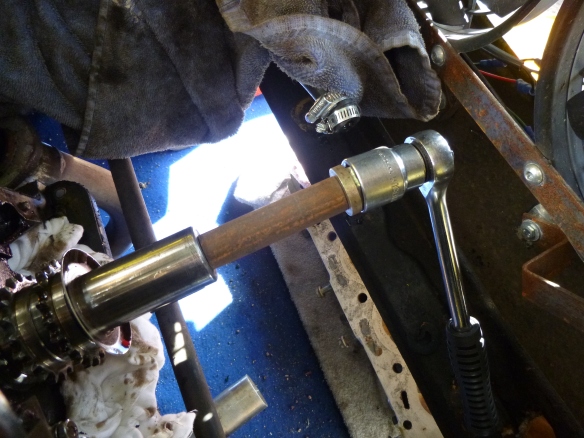
I made a spacer tube to fit on the end of the crank using the pulley bolt so we could turn the engine by hand, well at least with a ratchet!

Final Prep - Chain Removal 003

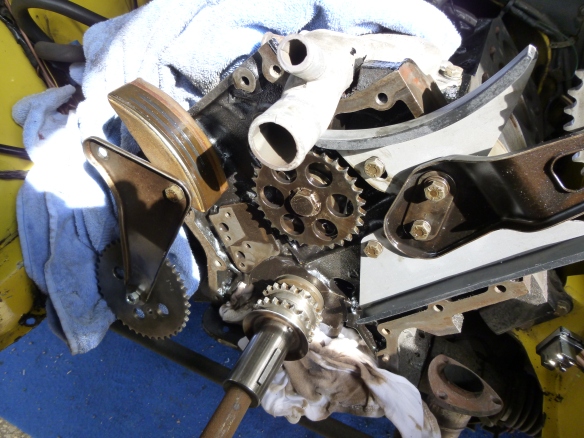
Chains off. I had to release the chain guides a little it the get enough room to get the chains out. You can just make out on the jackshaft that the alignment marks are pointed straight up and down at TDC….this is actually wrong. The mark should be slightly inclined down to the right. We reset this to be correct upon re-assembly.

Final Prep - Chain Removal 004

Good practice is to glaze bust the bores for re-assembly. The bores get highly polished over time. Glaze busting simply roughs-up the surface a little so that the piston rings bed themselves in again.

Final Prep - inc Chain Part-Refit 003

Two of the four new guides in place.

Final Prep - inc Chain Part-Refit 006

Other guides being fitted.

Final Prep - inc Chain Part-Refit 008

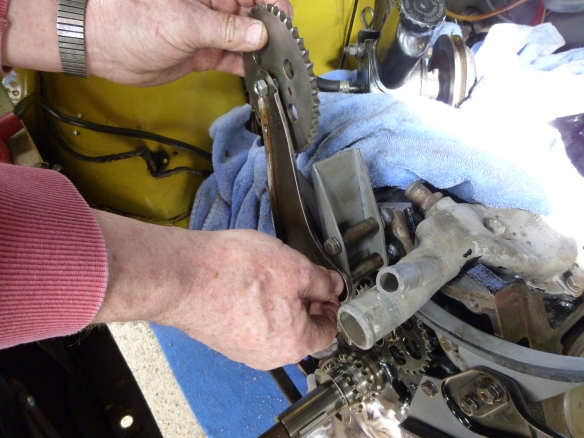
Fitting the tensioners. After examining the new ones and old ones we decided to use the new internal components but keep the old bodies. The reason for this was that the old bodies have locating dowels and the new ones do not. Also the old ones have a plate that would stop the tensioners coming right out, so we kept them as well. If you ever got to that stage mind you, you wouldn’t half have some stretched chains…..

Final Prep - inc Chain Part-Refit 012

Bottom tensioner in place.   Note the plastic spacer.    This is there to stop the tensioner releasing until you’re ready for final gap setting etc.

Final Prep - inc Chain Part-Refit 013

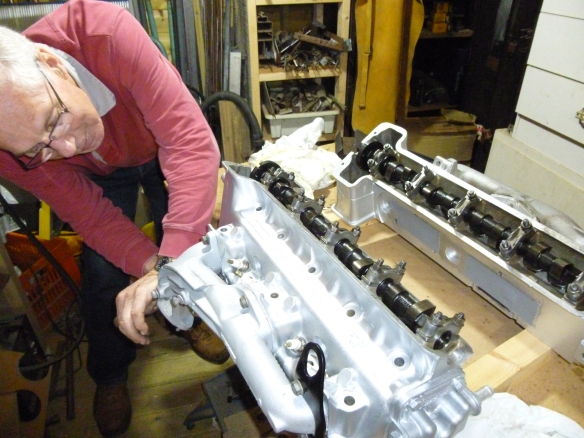
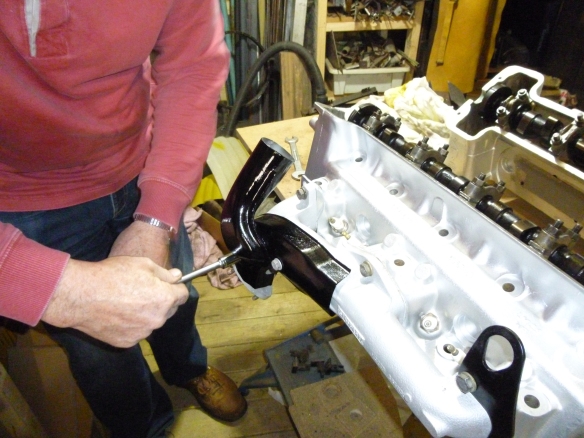
You can’t finally set tension on the chains until the heads are on so we left this at this point and went and finished the prep work on the heads etc. Here we are fitting the manifolds.

Final Prep - inc Chain Part-Refit 018

Nice shiny hot air intake goes onto the manifold.

Final Prep - inc Chain Part-Refit 019

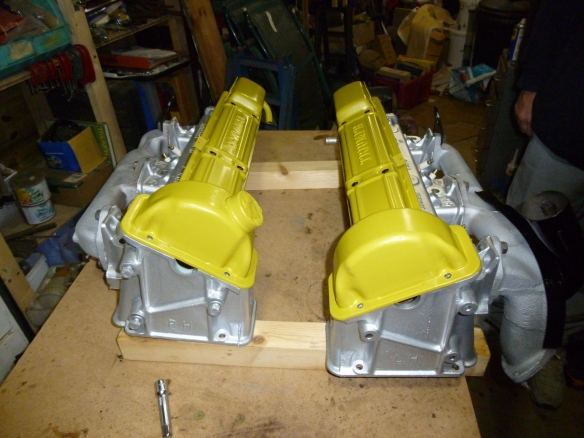
And finally, the nice (well I think they look nice anyway) cam covers resting on the heads.

Final Prep - inc Chain Part-Refit 020

MORE TO FOLLOW……


PLEASE NOTE – these are NOT instructions on how to undertake this job just some pics and words of our experiences, always consult professionals when undertaking any repairs or restorations. (please refer to the disclaimer on our about page)